What do you need?
You need a computer that is connected to the internet, with Windows, Mac OS or Linux. It is possible to attend using a smart phone with iOS or Android, using the Adobe Connect app, but a normal PC/Mac is highly recommended.
To run Adobe Connect, you need to have the Adobe Flash Player installed. Most computers already have Flash installed. Check if you have Flash player here: http://admin.adobeconnect.com/common/help/en/support/meeting_test.htm
You need a loudspeaker or headset to listen to the other participants. You will also need a microphone to speak, and a web camera to be seen.
We recommend using a headset to avoid echo and feedback.
How do you join a meeting?
You have probably received an invitation to a meeting via e-mail, if so, please press the link provided in the e-mail. Simply select Enter as Guest, type in your first and last name, and click "Enter Room".
For further instructions please see: https://seminars.adobeconnect.com/_a227210/vqs-participants/
How do you host a meeting?
Log in
Enter connect.uninett.no in to your browser. Log in with your regular username and password. You cannot host or create a meeting if you don't have an UiO account or if you are not associated with another institution who has access to Adobe Connect.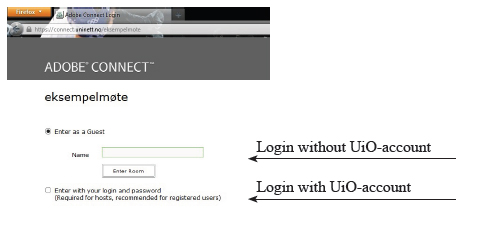
Creating a virtual meeting room
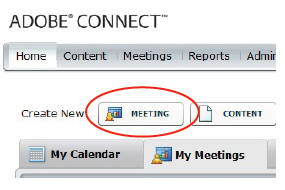
To set up a new meeting, click "Meeting" under the main menu. Here you can also see the meetings you have participated in in the past.
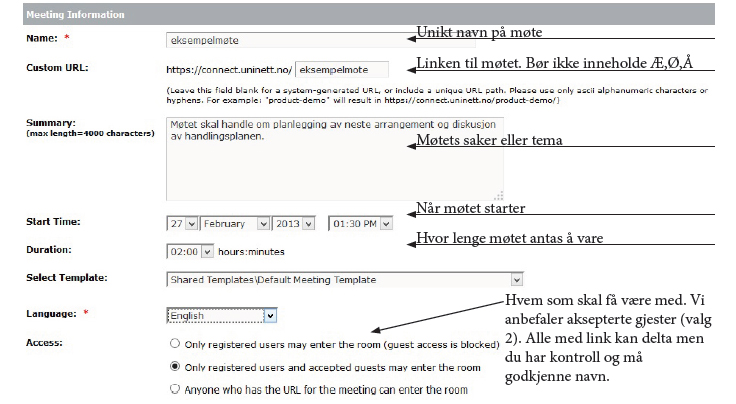
Fill in the information needed to create a new meeting.
Click «next». This will take you to a new page where you can select the participants. You can search by name, but if the person you are searching for is not registered with Uninett or has not used Adobe Connect before, you will have to send an e-mail manually. You will find the link on the next page. As soon as an UiO employee is logged in to Adobe Connect, you can search for them.

Click “finish”. This will take you to a page which summarizes the settings you have chosen for the meeting. On this page you can make changes if needed.
Setting up the equipment
Before the meeting
In addition to a computer with an Internet connection, you will need a webcam and a microphone, either external or integrated in the computer. The external cameras and microphones have the best quality, but many of the integrated ones are good enough for smaller meetings. You can also use headphones with a microphone or a combined microphone and speaker with echo cancellation. If there is any equipment you don’t have, contact Local IT, the AV-service or USIT’s multimedia group to borrow equipment. Remember to test the equipment ahead of the meeting.
We recommend Firefox, Internet Explorer or Safari as a browser. It is more likely that everything will run smoothly if you make sure that the browser of your choice is updated. You will also need Adobe Flash Player. This is installed in most computers. If not, contact Local IT. If possible, connect to the Internet with an Ethernet cable. This will ensure better quality.
If you want to test your equipment before use, follow this link.
Starting the meeting
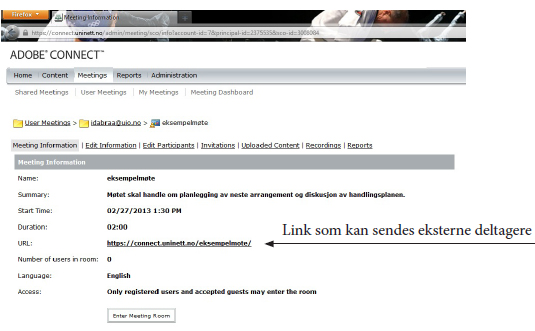
Start the meeting either by typing the link to the meeting you created earlier, or going through connect.uninett.no and logging in. The meeting will be on the same page you created earlier and will open up in a new window when you click the link.
If it is your first time using Adobe Connect or if you are using a different computer than normal, we recommend running the Audio Setup Wizard to get the best sound quality. You will find it in the menu, under “Meeting”. You don’t have to run this every time, but it is recommended to get the best quality of sound.
“Audio Setup Wizard” will guide you and check the speakers and microphone, in addition to measuring the silence.

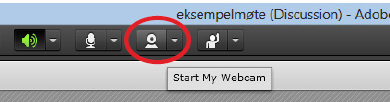
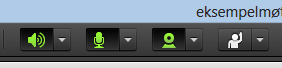
After the wizard is done you have to share your sound and image. To do so, click the webcam icon in the menu.
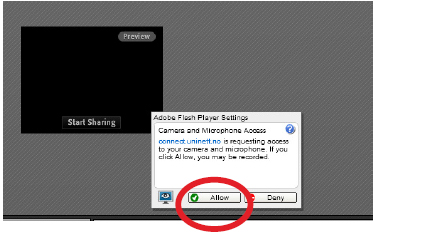
To approve access to your microphone and camera, click “allow” in the dialogue box that appears in the middle of your screen.
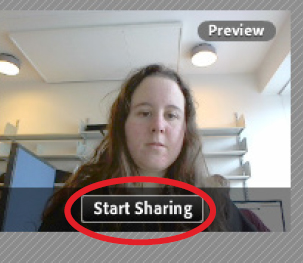
Click “start sharing” for others to see you.
Activate the microphone by clicking on the microphone icon.

When this is done, all the three icons should be green.
If the participants cannot hear you make sure that the host has given you the role as “presenter” or given you permission in any other way.

After the meeting
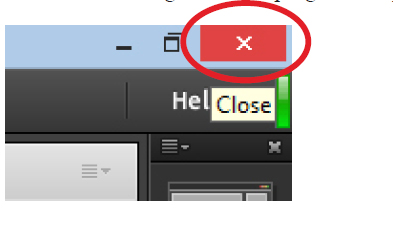
When the meeting is done, close the program by clicking the “X” in the top right corner.
Management and roles
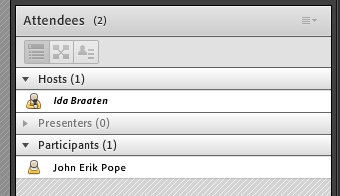
When all the participants are connected, it’s the host who has all the administrative rights. There are three roles:
- Host
- Presenter
- Participant
Suggestions and tips
Meeting with few participants (2-4)
Give them all “presenter” status. This means everyone has the opportunity to speak. Since there are few participants it is unlikely that you will have any problems with people speaking over each other.
If someone is presenting something that the other participants do not need to hear, mute your microphone.
Meeting with many participants (8+)
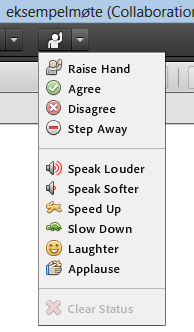
Use the “raise hand” function. If you find it too hard to both administrate and pay attention, ask somebody who is not a participant to help with administrating the meeting and make a speakers list.
If someone is going to present something, you (as the host) can make them a presenter while they are presenting and change them back to “guest” after the presentation and following discussion is done.
In the “raise hand” menu you will also find other useful buttons if you want to communicate something to one or all the participants.
Changing the visuals
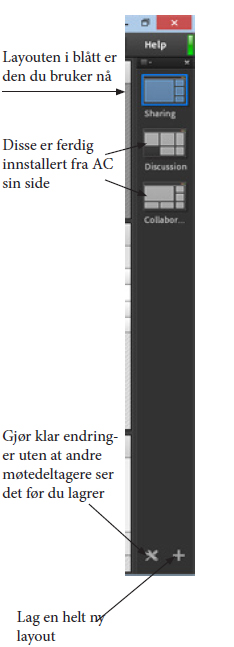
Depending on what kind of meeting you are having,you can set up the visuals in different ways. For example: presentations and discussions.
You can also change the visuals during the meeting, depending on what you are discussing. Adobe Connect has three preformatted layouts: Sharing, discussion and collaboration.
Choose the one that suits your goal in the menu to the right.
The layouts can all be changed. For example: You can drag windows, remove parts etc.
You can also save your favorite layouts if there are any other functions you need to combine.
Unfortunately, you cannot move the layouts to another meeting room, but it works great if you use the same room multiple times. This is usually a good idea if there is a group you often have video meetings with.
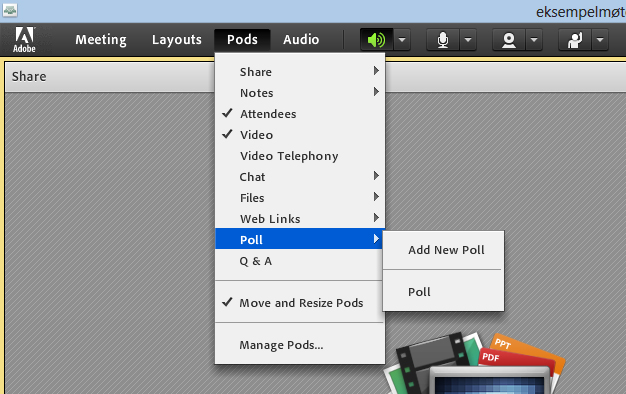
If you need to change anything, you can find all the functions in the menu under “Pods”. Click on the name of the function to add a new one to your dekstop view. If a function is marked with a check mark it means that it is already in the “room”. To remove the function, click the name.