1. Add new printer
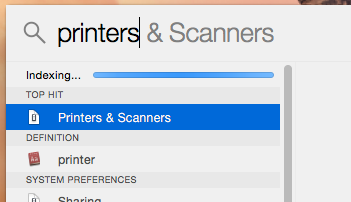
a) Go to the system preferences panel for printing - either by searching for "printers" with Spotlight, or by opening System Preferences from the Apple menu.
b) The printer settings look like this when no printers have been added to the computer.
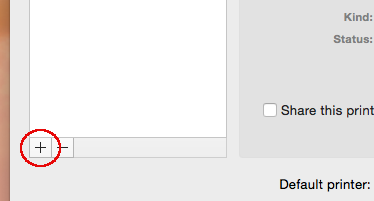
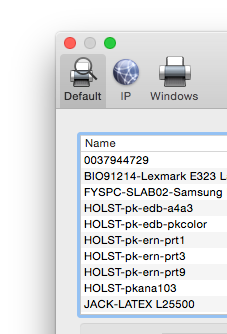
c) Click on "+" to add a new printer. The following window will open:
d) If you have an "Advanced" icon in the toolbar of the window, click on it and proceed to step 3. If not, follow the instructions in step 2 to get the "Advanced" icon.
2. Getting the "Advanced"-icon
The advanced icon is not shown by default in the "Add printer" window, but to add the printer correctly, you need access to the Advanced options. Follow the instructions below to be able to see the "Advanced" icon.
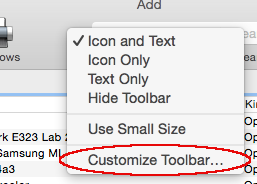
a) Right click anywhere in the toolbar in the "Add printer" window, and choose "Customize toolbar".
b) Move the "Advanced" icon to a spot on the toolbar. You do this by drag and drop.
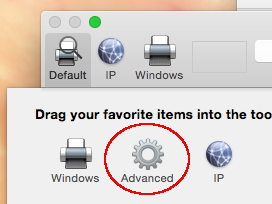
If the icon is moved to the toolbar, it will look like this:

3. Add and choose driver
While the content of "Advanced" is loading, you will see a spinning wheel. When it is completely loaded, it will look like this:
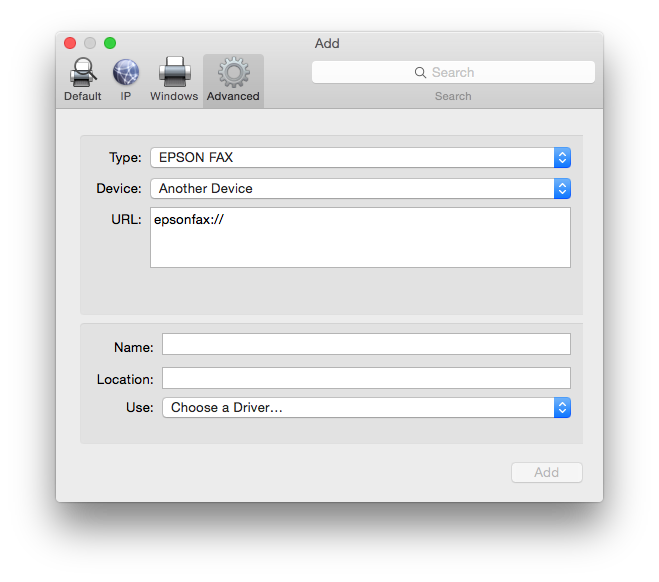
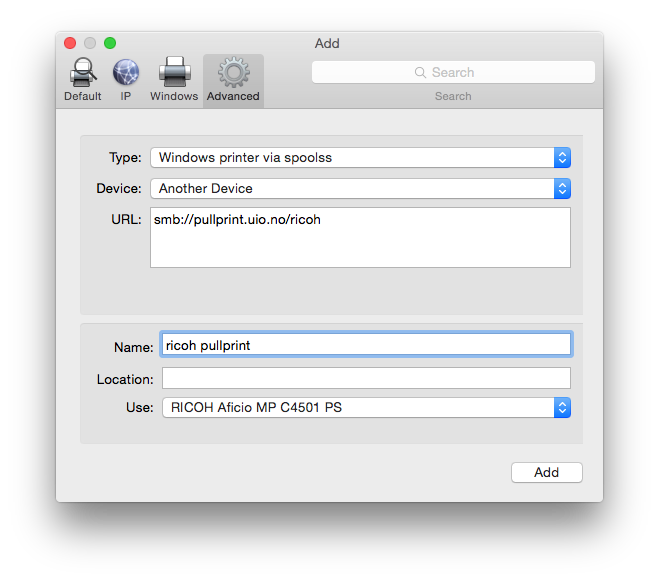
Add the correct information for the printer you want to add:
-
From the Type menu, choose "Windows printer via spoolss".
-
Let "Enhet" be unchanged
-
In the URL field, write the following url:
smb://pullprint.uio.no/queue
-
Instead of the word "queue" at the end of the URL, write the printer providers name. This depends on the brand on the printer you plan on printing your document on. In the example below, the document will be printed on a Ricoh printer. Du write in ricoh, hp or xerox depending on the printer you are to use. Generally all Mac's serviced by the University of Oslo and enrolled into our service "Mobile Workspace" have those drivers. But if your computer doesn't have them, you can still use the one called "Generic Postscript driver".
-
In the Name field you enter a name for the printer that you choose yourself.
From the Use menu, choose a driver. The driver tells your computer what kind of information the printer is susceptible to. One driver can work with a lot of printers. However, as a rule, the driver with the same model name as the printer you are to use, usually works best. Here we chose the same model name as the Ricoh printer we are going to use:
Depending on the driver you have chosen, you might get special settings you can use on the printer.