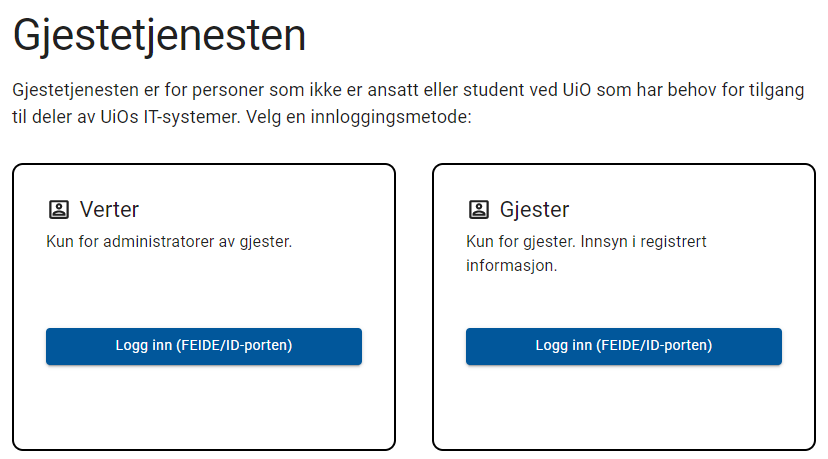
1. Registering a guest
- Log in to gjest.uio.no (Guest Registration). Choose log in for hosts:
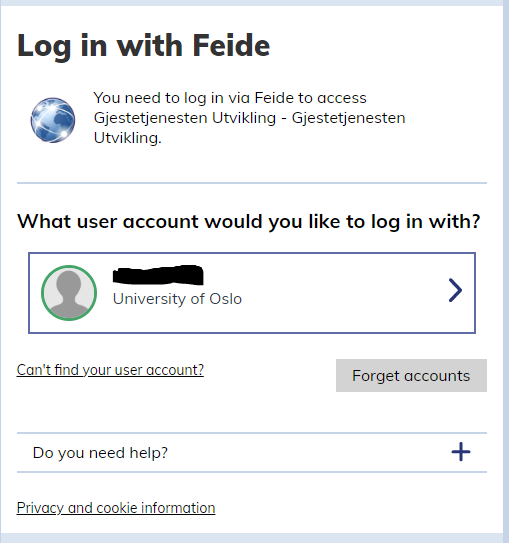
- You may be asced to choose which user you want to log in with. You will also have to choose Use work or school account:

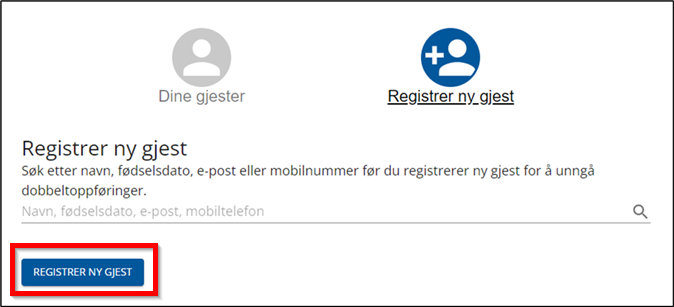
- When you are logged in to Guest Registration, click Register new guest:

- You will then see the following screen. This is where you search for the guest in the hope that they already exist in the system. If not you can register them by clicking the Register new guest button in the lower left:
- You will then see this form, where you fill in their name and e-mail:

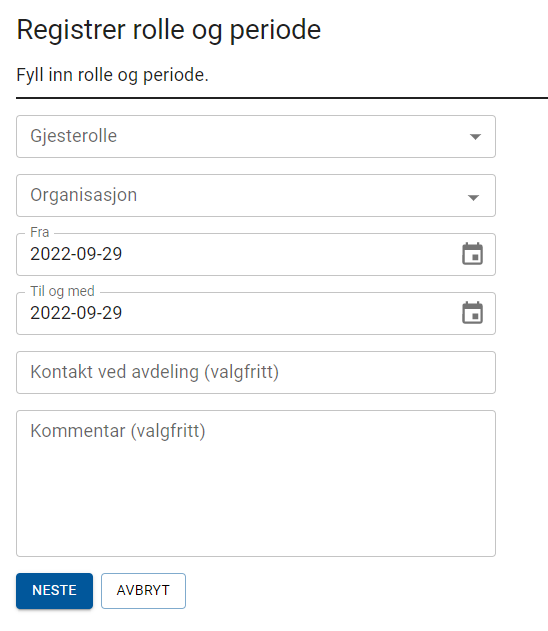
- Further down on the same page you choose which kind of role they should have, which unit they should be tied to and the duration of their stay at UiO. Continue by pressing Next in the lower left:
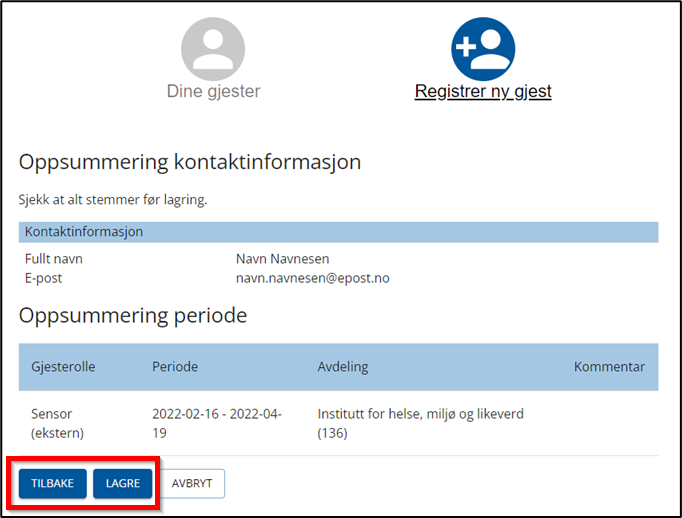
- This takes you to a summary of the previous steps. Double check that everything is as it should, and click the Save button:
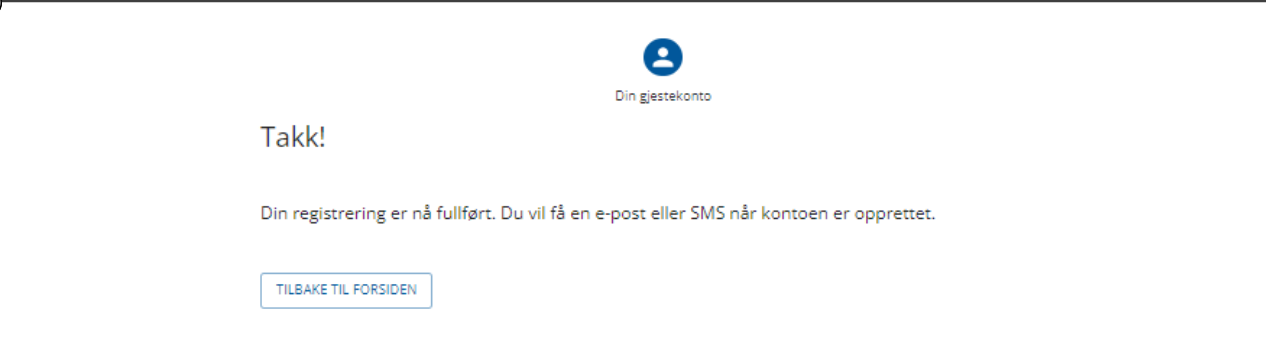
- Finally, you will get a message saying that registration was successful, and a button that takes you back to the front page:

2. The guest must register themselves
When you are invited to be a guest at UiO, you will have to complete the registration before your user account is activated. This is how that is done.
After the host has registered you, you will get an invite by email:
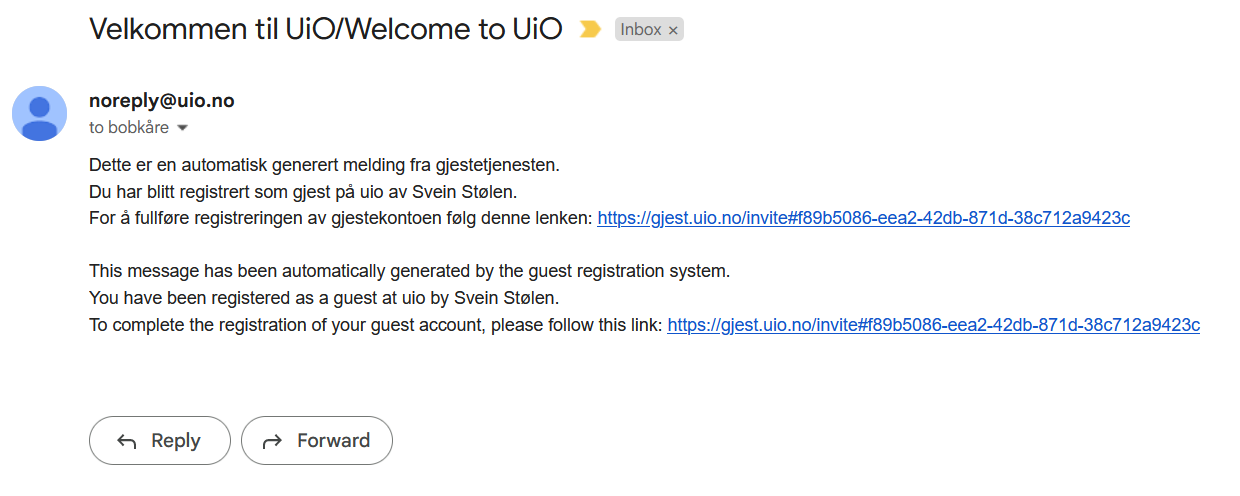
NB! Beware that some e-mail systems may sort this as spam. Pleas ask your guests to check this if they have not received an invitation.
The guest must follow the link in the e-mail and complete the registration. If the guests follows the manual route there is an extra step where the Host must verify the guest's identity.
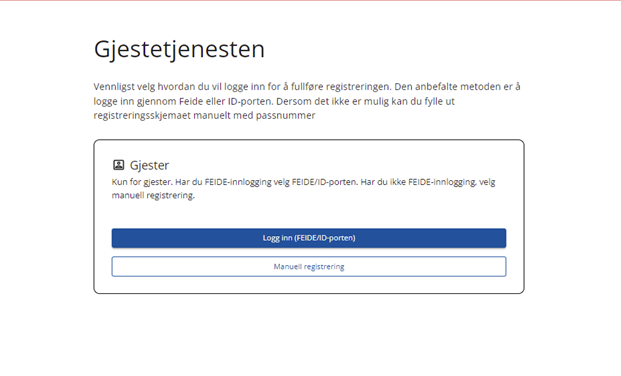
When registering you will have to choose between Login (FEIDE/ID-porten) or Manual registration.
- Choose Login (FEIDE/ID-porten) if you have a FEIDE-account at another institution, or if you can log in using ID-porten (BankId, MinID, etc.).
- This makes the process simpler, and the host won't have to verify your identity, making your account available faster.
- If you can't log in using FEIDE or ID-porten you will have to choose Manual registration and fill in the form. If you choose this, the host will have to verify your papers before the account becomes available.
Registration using FEIDE
Choose Login (FEIDE/ID-porten) followed by Feide-pålogging.
Log in using your Feide-account (uesrname and password).
You'll note that some parts of the form are now pre filled by information from Feide.
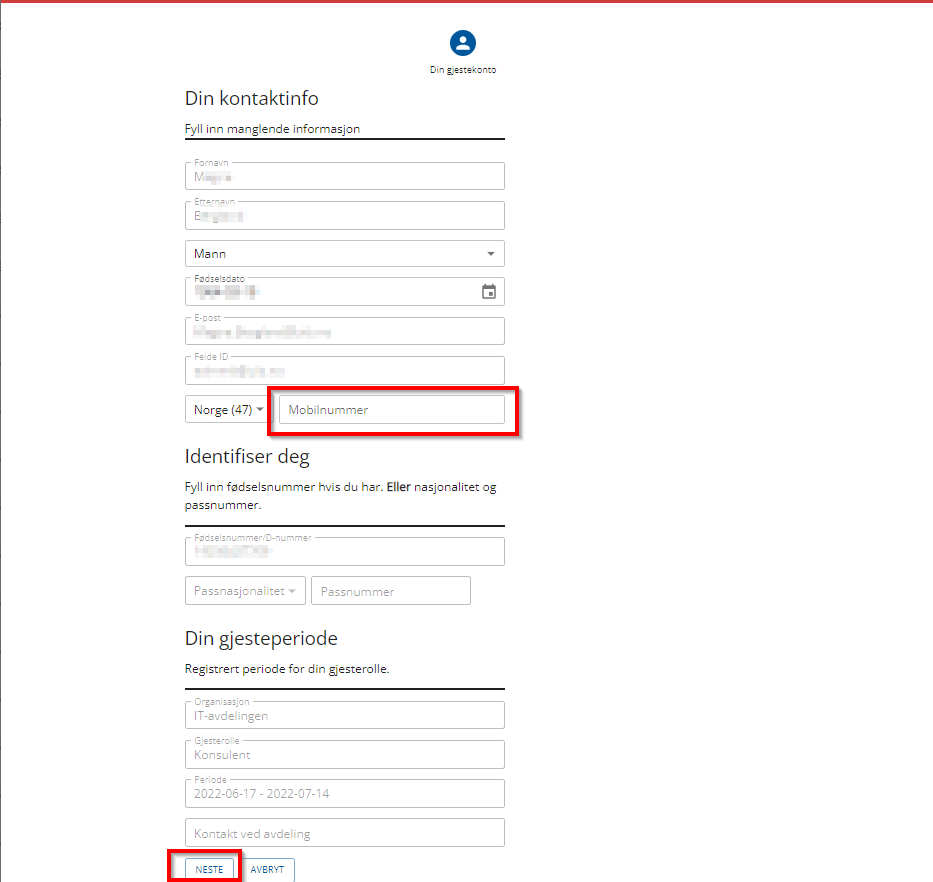
In this case we only need to fill in our mobile phone number.
Continue by pressing Next.
Answer yes or no to whether or not you want your name to be searchable on UiO's websites. You also have to accept the IT rules.
Complete the process by clicking Finish registration.

The registration is complete. If you did not choose manual registration you will receive an SMS shortly, prompting you to set a password for your new account at passord.uio.no.
You can view the information we have saved of you by clicking Go to front page:

3. Guests waiting for confirmation
If the guest chose to register manually you will have verify their information. This is done by:
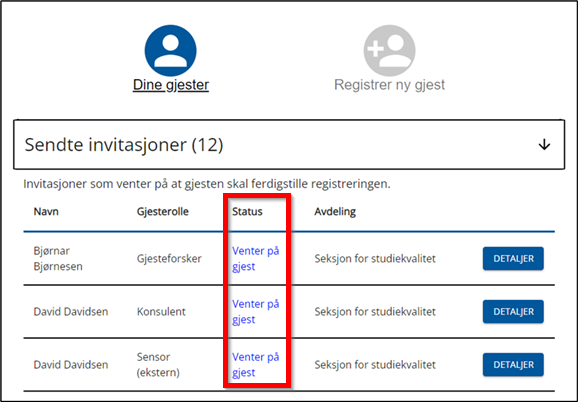
- When the guest has registered you can click on Guests waiting for confirmation:

- This shows you a list of guests that have registered, and are waiting for you to verify their information. The new guests will be at the bottom of the list. Guests waiting for confirmation will have status Needs confirmation until they are verified. Each line has a Details button:

- Click the Details button to the right to look at each guest and verify them.
- This brings you to the guests profile page:
- Press the Confirm button to verify and confirm that this guest's identity, prompting the creation of their using account.
4. Confirmed guests
You can view confirmed guests on the front page by clicking the line:

This shows you a list of your confirmed guests. Each role will have status Active or Expired. Each line has the familiar Details button on the right:

Clicking it shows the following:

Here you have the option of re-sending the invitation or cancelling the invitation altogether.
You can also Add role, or if you want to go back to the main menu click Back.
Clicking Add role takes you to the following screen, where you can register a new role at a unit, with start and end date as usual.

Remember to click Save after filling out the information. If you've changed your mind, click Cancel or Back
5. Comparing the guests identification to the registered information
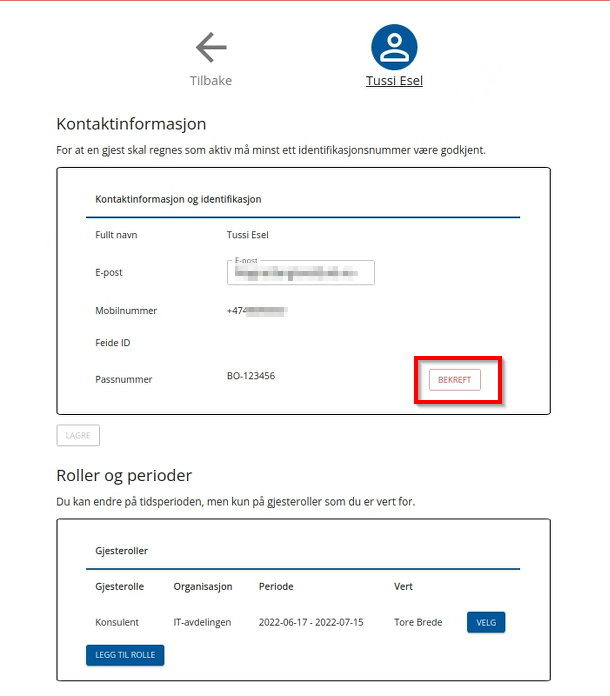
Guests that have authenticated using ID-porten (BankID) will be automatically verified since ID-porten supports "strong authentication". For those that can't use ID-porten and have to do the manual registration, there is an extra step where the host verifies the information. It is important that the host verifies that the guest's passportnumber matches.
Verification is done by physically meating. Verify that the number in the guest's passport matches the one registered in Guest Registration.
This step is crucial for preventing mistaken identity.
6.View and modify invitations
A host for guests you can view and modify sent invitations.
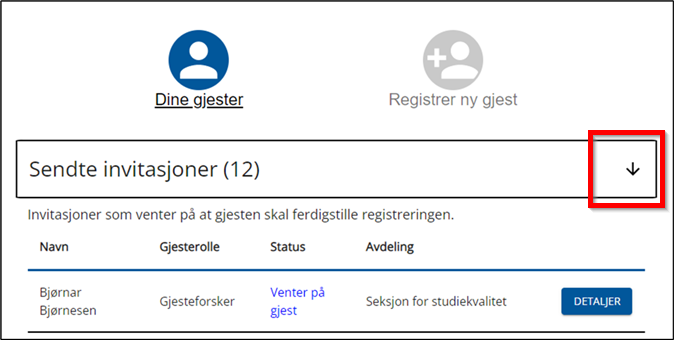
To view invitations, go to the front page of Guest Registration and click on the drop down named Sent invitations:

You now see the list of sent invitations at the units you control, where the latest invitations are found on the bottom. Invited guest will have status Waiting for guest until they have completed their part of the registration:
To view information about the guest and the invitation, click the button on the right marked Details:

Here you have the option of re-sending the invitation or cancelling the invitation altogether.
You can also Add role, or if you want to go back to the main menu click Back.
Clicking Add role takes you to the following screen, where you can register a new role at a unit, with start and end date as usual.

Clicking Choose takes you to the screen where you can change the dates of the role., or if you want, you can end the role by clicking End role button:

Click the arrow to return to the frontpage:
See also